Craft Resin was originally designed as a coating resin, which is a resin that is used to coat a thin layer to things like artwork. However you can also use Craft Resin for other projects and pouring in one layer if your project is below 1/4 inch, which is the depth at which Craft Resin self levels.
You can still create thicker projects using Craft Resin, but you will have to change your techniques slightly and create thicker projects by layering.

When it comes to building your resin projects up in layers you have two ways in which this can be done:
1 - Pour your first layer, wait a short while, then pour another.
Or
2 - Pour your first layer, wait till that’s cured, sand it down then pour another on top of that.
Let's go through the above steps in more details to teach you how to do this…
1 - Pour your first layer, wait a short while, then pour another:
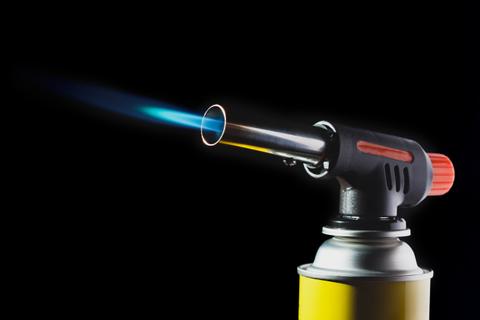
Pour your first level as you normally would, remove any bubbles that form with your heat torch, then wait between 3-5 hours (the more times you create a project the better you’ll get at knowing how much time to leave it).
Between 3-5 hours your resin won’t completely cure and will still be a thick, but not runny, semi-liquid state. You can pour another layer of resin mix onto this, get rid of any bubbles with a heat torch, and leave again for between 3-5 hours.
To build up your project to reach its full height, simply repeat the steps above till the desired height is met. You can repeat this step as many times as you would like.
But you will need to increase your projected curing times to longer than 24-72 hours, depending on the thickness and how many layers you end up with. A thicker project will need to be kept in a warmer room to cure for much longer than 24 hours, sometimes even beyond a week or so.
We can’t tell you exactly how long this will take, because every project will be a different thickness so will need different curing times. Again the more you create and repeat a project the more you’ll build up the knowledge of your curing times.
If you are selling thicker projects to customers, then please make them aware before they purchase that the item will take longer to produce and it will take longer than normal to cure fully. This will set their expectations and will reduce your stress levels trying to get it to cure quicker!

2 - Pour your first layer, wait till that’s cured, sand it down then pour another on top of that:
The other option for layers is to pour your first 1/4” layer, use a heat torch to remove any bubbles, then leave this covered to fully cure.
Once this layer has cured you can use a sandpaper of between 80-120 grits to sand the top layer down, wiping clean any sanded grit from your project, ensuring your project is dry, before applying another layer of resin mix to this.
Again repeat the steps above till your resin project is at the desired height.
Both methods offer great options for building your projects up in layers. You may want to experiment by trying both to find the one that works best for yourself, with the particular thick projects that you will be creating.
Bubbles can be a bit trickier to get rid of in thicker projects, especially ones with items like flowers in. Pay attention to your work while it cures through each layer and then use our guidance on getting rid of bubbles to help combat these.
When creating a thicker project, you will potentially be using more resin mix than normal. Because of this you will need to be aware of the chemical reaction that happens when the resin and hardener are mixed called the exothermic reaction.
Exothermic reaction with thicker pours:
The exothermic reaction is the name of the chemical reaction that happens when the resin and hardener is mixed together, this reaction starts the curing process (hardening) off, a by product of this reaction is heat.
You’ll notice your mixing container getting warmer if you hold it while you mix your resin and hardener together, and when the resin is poured and left to cure it will get warmer still over the next few hours.
The more resin and hardener you mix together the more heat is generated, so you need to monitor this with thicker pours that require more resin mix and control it where possible.
If you don’t control the exothermic reaction this is when flash cures can happen, and can even cause your resin mix to give off smoke, a lot of heat and potentially even dangerous vapours. The heat given off in these extreme reactions can even cause nearby items to catch fire.
If you are going to be mixing larger amounts of epoxy resin together at once, then please make sure that you don’t preheat your resin in a warm sink of water before hand. Make sure that you mix slowly and for no longer than about 3-4 minutes.
This is also the only time that working in cooler environments would be more beneficial. Lower the temperature in your working and curing area to below 20C or 70F, and then increase the temperature back up towards the end of the cure, once the resin mix has cooled down more.

Following the steps above will also help, when you pour in layers you need to mix less resin mix at once, you also allow for the first layer to start cooling down before pouring the next, if not fully curing and cooling down all together with step 2.
You do need to be careful not to leave the gap between pouring your next layer too long though, after the 5 hour mark the next layer of resin mix may not join fully to the last one, or leave a line in your work where the two join because they haven’t fully bonded together.
Again some experimentation with timings may be needed to find your projects sweet spot.
If you are an artists who creates a lot of thick projects and would like to share any other tips, please put them in the comments below. It’s always great when our community shares advise to help others.
Team Craft Resin

