

Since launching our Deep Pour Resin we have noticed an increase of many of our community creating larger Flower Resin projects casting whole flowers, not just dried pressed flowers or petals.
Our Low Viscosity Resin is perfect for casting small, or thinner projects, therefore it's perfect if you're creating things like resin jewelry with petals in them, resin coasters with an array of pressed flowers in them, or resin bookmarks with delicate smaller flowers in. These are great projects to create and can look very beautiful with the touch of adding flowers or petals to them. If there are what you're looking to create then head on over to our How To Add Flowers In Epoxy Resin blog, that will talk you through these techniques.
But if you'd like to up your resin flower game, and you'd like to start creating thicker projects casting whole flowers, bunches of flowers and even bouquets in, read on...

Before we do dive into this, if you are working on a commissioned project, or a sentimental project using yours or someone else's flowers, please practice first before you try this on someones only bunch of flowers they or you have from your wedding!
Things can easily go wrong with projects like this, if you try first time on sentimental flowers, you might end up ruining them forever - This isn't to put you off trying projects like this, we just want you to be armed with all the information so that you can create projects like this without any issues occurring.
Buy some flowers that are similar to the sentimental flowers you have, so you can see how they would look in your final project, practice, perfect, then move onto more precious flower projects.
Can I use fresh flowers?
This is the first thing to note with all flower projects, not just when using whole flowers. You cannot use fresh flowers in your resin creations. The reason is that they won't last inside the casting, fresh flowers rot and they will rot inside the project.
It might take a while before you notice this happening, but once you do there is no stopping it. When items are cast and epoxy resin has cured (hardened) around them, you cannot do anything to remove the items from the resin. Sometimes if you notice small imperfections these can be removed, but it still isn't easy to do, and you'll have to fix the issue once it's been removed, and the likelihood of fixing it so it's unnoticeable again is very rare to achieve.
Prevention is always better than cure, and that goes for resin projects too. If you can avoid issues in the first place, you won't have to fix them.
You can dry your flowers by placing them in forestry silica gel beads. Simply prepare the fresh flowers to how you would like them to stay looking when dry and then place them into a container with the gel beads, make sure they are fully covered and then leave them over night. You can tell the beads have soaked up all the moisture when you see the beads turn a different colour.
If you are unsure if all the moisture has been removed from them, simply leave them longer. It might take up to a week if your flowers are large.
The other way to dry flowers is the old school method of placing them between book pages and leaving them for at least a week. However this will flatten your flowers, so only do this if you would like a flatter look to your flowers. With whole flowers and preserving flowers from bouquets, you'll probably want to choose the first option of using silica gel beads.

Can I use any flowers?
Not all flowers will work in resin projects, so if you have a particular type of flower that you want to use, it’s always best to test it out in a smaller project first. And again referring back to the beginning point, don’t test this with sentimental flowers, get some to try that have no sentimental value to anyone!
One way to test this is to paint the resin mix onto one of the petals of the flower of choice, leaving that to set and seeing if it has any effect on the flower, such as a colour change, which is the most common problem to have.
It’s also worth noting to try to only work with flowers that aren’t damaged in any way. Sometimes resin can seep into damaged flowers and cause them to go translucent. This shouldn’t happen to flowers that aren’t damaged in any way.
This is a good thing to look out for when casting wedding flowers, sometimes these flowers have had one hell of a party to survive and many of them can be damaged in the process of having fun. Try to pick the ones that have survived if you can.
Another thing to note is to try to cast robust flowers, when casting whole flowers you want flowers that are going to stay together and not fall apart once dried and then the resin is poured onto them. Testing will let you know if your flowers are robust enough or not.

Which resin should I use?
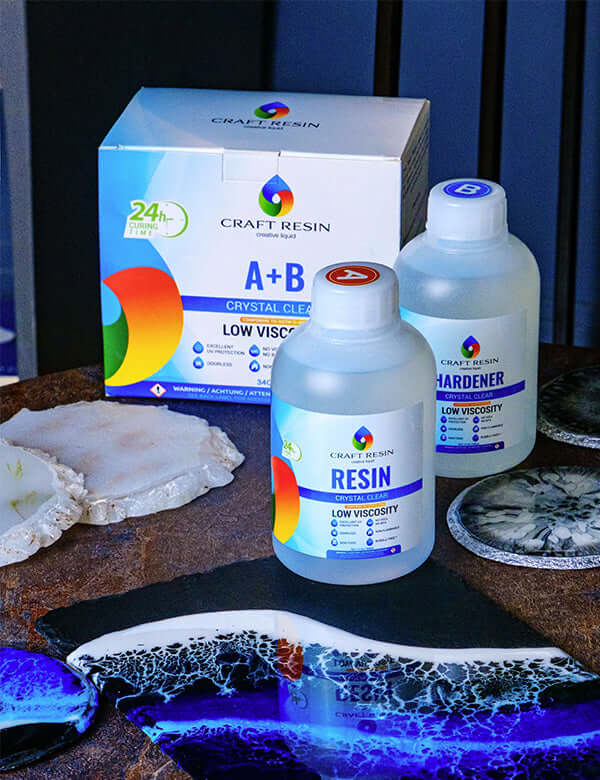
Now we have the Deep Pour Resin available, as well as the Low Viscosity Resin, what resin you use will be largely down to choice, as you can actually use both for casting whole flowers in resin, but the techniques will differ.
Both resin's will give you crystal clear epoxy resin results, which will show off your flowers perfectly.
Low Viscosity Resin - This is better for casting smaller projects, if your whole flowers are smaller this could be a good option for you to use still. When working with flowers you will have to create in layers with either resin because this will help you to control bubbles forming, but with the Low Viscosity Resin you will need to use more layers than you will with our Deep Pour Resin.
Our Low Viscosity Resin will also reach higher temperatures during the curing process, which can damage some of your more delicate flowers if not controlled.
You can learn more about using the Low Viscosity Resin to create thicker projects in layers, through the blog below:
Using Craft Resin On Thicker Projects
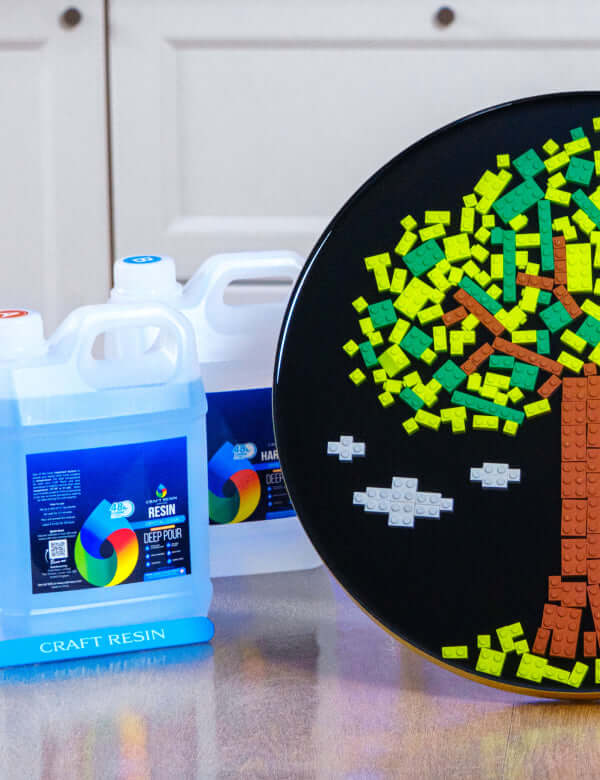
Deep Pour Resin - This is better for creating larger, or thicker projects. Casting bigger, whole flowers in something like a resin cube for example would be a great example of what this resin will be best for.
The Deep Pour resin takes longer to cure, 48 hours, and it doesn't reach quite as high temperatures during curing as the Low Viscosity Resin does, meaning that it's great at not damaging more delicate flowers. That's also the reason you can create larger projects using more resin in one go as it doesn't have the chance to flash cure if too much is mixed together, like the Low Viscosity Resin does.
You can use the Deep Pour Resin to create in less layers than you would need to use with our Low Viscosity Resin. But we would suggest still creating in layers because of the off gas that is produced by natural objects in resin, which can cause more bubbles to form. If you create in layers you'll be able to disperse the bubbles as you go more easily than if you poured in one go.
If you are experiencing a cloudy appearance in your Deep Pour Resin this can be down to thousands of tiny microbubbles forming, this will be because your resin is too cold. You will not be able to remove these microbubbles when you pour your project, unlike the larger bubbles that you can remove. So you'll need to warm the resin up before working with it to disperse these. Or some artists working with flowers in particular use a pressure pot to release the bubbles before beginning.
If bubbles are a concern, read our blog all about how to get rid of bubbles. The techniques in this blog will apply to both resin's:
Bubble Free Creations Are Attainable
You can also keep the whole flowers in the desired position when creating in layers too. Items can move around in resin as the resin goes from liquid to hard. If you cast in layers you can keep the object in the desired place and then add more once that has cured enough to keep it in position.

With both of the resin's we have available you're going to be able to create incredible whole flower resin creations. Our resin's are formulated to stop yellowing over time, and to stay crystal clear so your flowers stand out in them. Our resin is one of the clearest epoxy resin on the market, so perfect for casting flowers in.
As always have fun when creating any resin project. The more you practice, the better your projects will turn out, the different project genres you can move into and try. Creating whole flower projects can give you such a form of satisfaction when you do perfect the techniques, these projects look great in people's homes, they are really popular to be able to offer your customers as a resin business owner, so why not give it a go and try adding larger whole flowers into your resin creation repertoire.
If you'd like to create these kinds of projects we have a special offer running this weekend where you can get 15% off any Craft Resin product across all markets!

Use Code: EARLYMAY15 at the discount box at the checkout and click apply.
This offer applies to one time purchases, not subscription orders. There is no minimum purchase requirement and no usage limits. Can't be combined with other discounts.
Please make sure the discount has been applied before clicking purchase as no partial refunds will be given after the order is placed. If you have any issues using the discount please contact our Customer Service team through the Contact Us form on the website:
Shop now
Offer ends 23:59 1st May 2023.
Topic Of The Week Giveaway:
We have attached a giveaway to these Topic Of The Week announcements on our Instagram platform, this is helping us to spread the knowledge of how to use epoxy resin further, but also enabling anyone who helps us share this information to win free resin and mica powders.

To enter the weekly giveaway please see the latest post #CRWEEK18 on our Instagram feed/highlights and follow the instructions to enter:
Team Craft Resin

