


- What resin flower preservation is and when it works better than pressing, framing, or drying flowers alone
- How to prepare flowers, petals, and bouquets before resin so they are fully dry and ready to cast
- Which Craft Resin formula to use for deep bouquet blocks, shallow molds, jewelry, coasters, trays, and finish coats
- How to preserve dried flowers, pressed flowers, petals, and floral arrangements in clear epoxy resin
- What tools, molds, safety equipment, and workspace conditions you need before your first pour
- How to avoid common problems like bubbles, cloudiness, floating flowers, yellowing, overheating, and early demolding
Flower preservation in resin is a way to turn dried flowers, petals, or an entire bouquet into a clear, long-lasting keepsake. Instead of simply pressing flowers in a book or displaying dried stems in a frame, resin encapsulates the botanical material inside a protective, glass-like finish. This makes it popular for wedding bouquet preservation, pressed flower jewelry, coasters, trays, paperweights, framed displays, and decorative floral blocks.
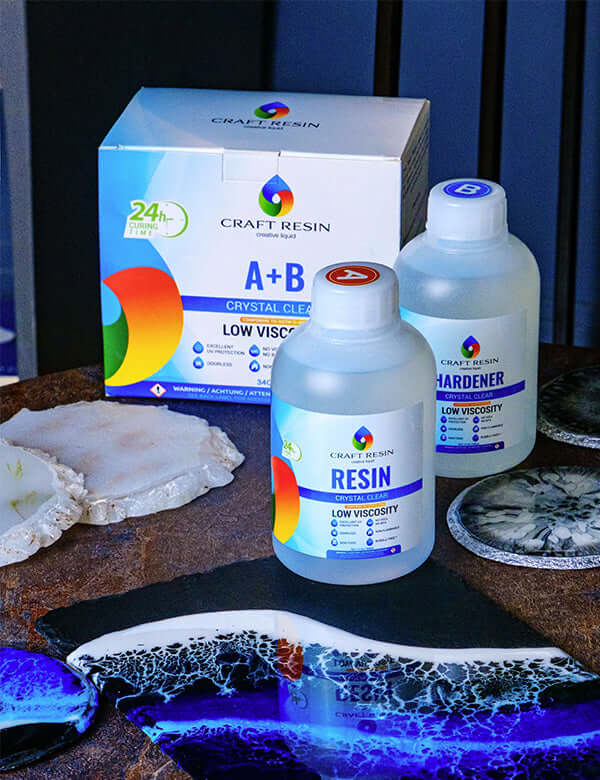
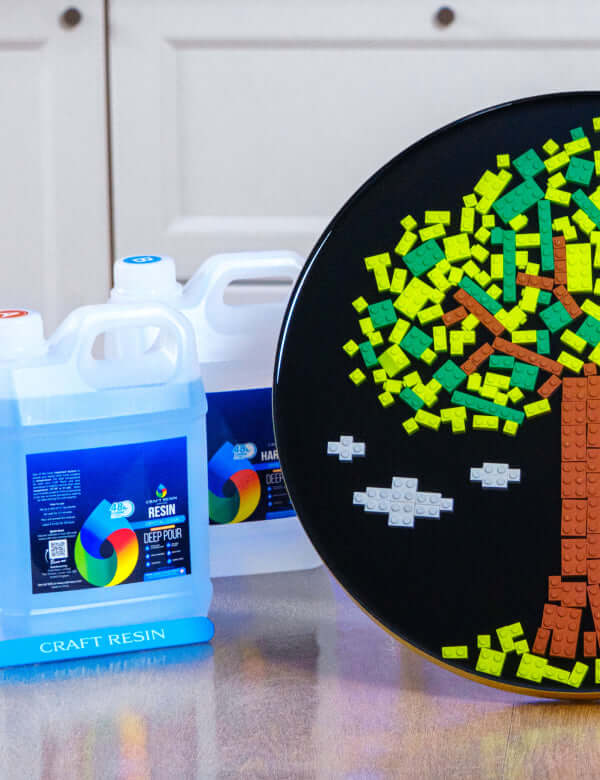
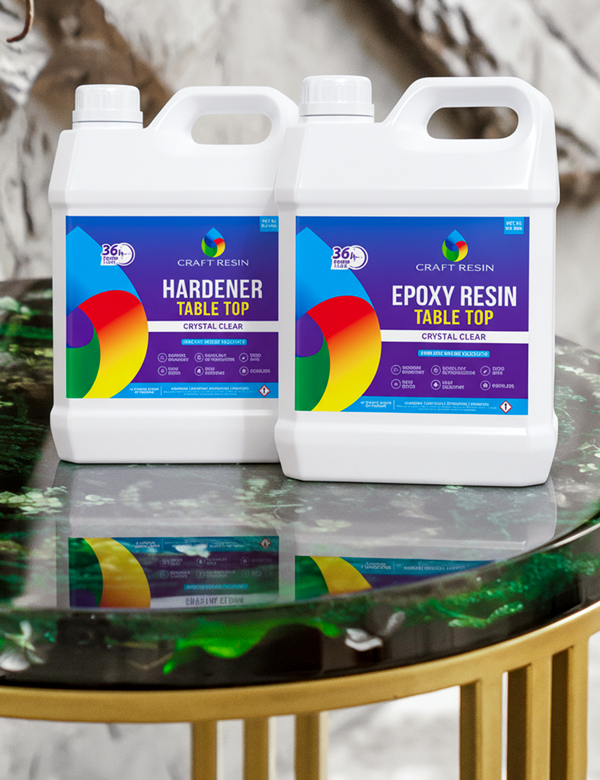
The key to a clear result is preparation. Flowers must be completely dry before they touch resin, and the resin formula must match the depth of the project. Use Craft Resin Deep Pour for thick castings and blocks. Use Craft Resin Table Top for a protective gloss finish on flat surfaces. Use Craft Resin Arts and Crafts for thin base layers or shallow mold work.
What Is Flower Preservation in Resin?
Flower preservation in resin is the process of encapsulating dried flowers inside clear epoxy to protect them permanently and display them as a decorative object. Once sealed inside resin, the flowers retain their shape, colour, and detail indefinitely. The resin protects them from moisture, dust, handling, and UV light, depending on the formula used.

This type of project sits at the intersection of nature and craft. It is used by florists to preserve wedding bouquets, by makers to create decorative homewares, and by artists working with natural materials to build one-of-a-kind pieces that last.
The result can range from a small pendant with a single pressed flower to a large block with a full bouquet suspended inside. What makes the difference between a cloudy, bubble-filled result and a crystal-clear, professional piece is the preparation of the flowers, the choice of formula, and the layering technique. Want to see the full process before you start? Watch our step-by-step flower preservation tutorial to see how it comes together from start to finish.
How to Prepare Flowers for Resin Preservation
Flowers must be completely dry before contact with resin. Any moisture remaining in the petals causes the resin to turn cloudy, produce bubbles, or discolour around the flowers permanently.
Air drying: Hang flowers upside down in a warm, dry, well-ventilated space for 2 to 4 weeks. This is the simplest method and works well for most flower types.
Silica gel drying: Bury flowers in silica gel crystals for 3 to 7 days. Faster than air drying and better at preserving colour and shape, especially for fuller flowers like roses and peonies.
Pressing: Place flowers between absorbent paper under heavy books for 2 to 4 weeks. Best for flat jewelry and coaster work. Not suitable for three-dimensional bouquet preservation.
Microwave with silica gel: A faster version of silica drying. Works well for individual blooms. Requires careful timing to avoid over-drying. Do not use fresh flowers directly in resin.
The moisture content will cause the piece to fail.
What Projects Can You Make with Flower Preservation Resin?
Resin flower preservation covers a wide range of project types. The main variable is depth. Shallow projects use thin layers. Deep projects require a casting formula that manages heat during thick pours.

- Wedding bouquet preservation blocks. One of the most popular applications. Flowers from a wedding bouquet are dried, arranged inside a mold, and encapsulated in a clear Deep Pour casting. The result is a permanent display piece that holds the exact flowers from a specific occasion.
- Decorative paperweights and blocks. Geometric or freeform resin blocks with flowers suspended inside. These work well as table decor, gifts, and display objects. Depth typically ranges from 3 to 6 cm, which puts them firmly in Deep Pour territory.
- Serving trays and table surfaces with pressed flowers. Pressed flowers embedded in a resin surface. Arts and Crafts resin is used for the embedding layer, and Table Top is applied on top for a hard, durable, food-safe-when-cured finish.
- Coasters with embedded botanicals. A popular beginner project. Thin silicone molds, shallow pours, pressed or partially dried flowers. Arts and Crafts resin handles the pour depth well and captures floral detail cleanly.
- Jewelry with real flowers. Pendants, rings, and earrings with pressed petals embedded in resin. These are small, thin projects that use Arts and Crafts resin in silicone jewelry molds.
- Wall art panels. Large flat resin panels with a floral arrangement sealed beneath the surface. A base layer of Arts and Crafts resin holds the flowers in place, and Table Top provides the glossy protective finish over the top.
- Framed flower displays. Dried arrangements framed behind a layer of clear resin poured directly into a contained frame. Depth determines which formula to use.
Which Craft Resin Formula Is Right for Flower Preservation?

This is the most important decision in any flower preservation project. The wrong formula produces a result that is cloudy, cracked, bubbly, or simply does not cure correctly around botanical material.
| Project type | Recommended formula | Why |
|---|---|---|
| Thick bouquet blocks (3–6 cm deep) |
Deep Pour | Handles depth without overheating. Low viscosity flows around flowers. |
| Medium depth blocks (up to 2 cm) |
Deep Pour in staged layers | Safer heat management for medium volumes. |
| Shallow coasters and small molds (up to 6 mm) |
Arts and Crafts | Low viscosity fills detail and releases bubbles fast. |
| Jewelry and pendants | Arts and Crafts | Thin pour, fine detail, clean release from silicone molds. |
| First thin seal layer over flowers | Arts and Crafts | Flows around petals and seals air pockets before deeper pour. |
| Surface coating and final gloss finish | Table Top | Hard, durable, scratch-resistant, glass-like finish. |
| Tray surface with embedded flowers | Arts and Crafts (base) + Table Top (finish) | Embedding layer holds flowers; Table Top protects and seals. |
Craft Resin Deep Pour: for thick castings and bouquet blocks
Deep Pour is the correct formula whenever the pour depth exceeds 6mm in a single layer. For most bouquet preservation blocks, that means it is the primary formula.
Its viscosity of 600 CPS at 25°C is the key property here. At that viscosity, the resin flows freely around petals, stems, and leaves without trapping air. Bubbles rise and pop naturally with minimal torching. It can be poured up to 6 cm per layer on large open molds, which makes it ideal for the deep blocks that full bouquets require.
Deep Pour also has a 90 to 100 minute working time, which gives you enough time to arrange flowers precisely inside the mold before the resin begins to thicken. For staged pours with multiple layers, the extended working time allows careful placement at each stage.
For more detail on how Deep Pour works and how to plan staged pours, read our Craft Resin Deep Pour formula guide.
Craft Resin Arts and Crafts: for thin layers, shallow molds, and sealing
Arts and Crafts resin at 1400 CPS is the right choice for any flower preservation work that stays within 6mm per layer. It fills mold corners cleanly, flows around fine botanical detail, and releases bubbles faster than a thicker formula.
It also plays a specific role in deeper projects: the first seal coat. Before pouring Deep Pour over dried flowers, applying a thin Arts and Crafts layer that partially covers the flowers and seals any air pockets dramatically reduces the bubble problems that come from unsealed botanical material. Once that thin layer reaches gel state, the Deep Pour layer goes on top.
Craft Resin Table Top: for protective finish coats
Table Top at 3800 CPS is not a casting resin. It does not go deep and it is not designed to encapsulate flowers. Its role in flower preservation is the final finish coat on flat surfaces: trays, panels, display boards, and surfaces where a hard, glossy, scratch-resistant layer is the goal.
A coat of Table Top applied over a cured floral resin surface adds durability, heat resistance up to 95°C, and a glass-like gloss that elevates the finished result. It also provides stronger UV protection than Arts and Crafts, which is important for displayed pieces that may receive sunlight.
What You Need Before You Start

Molds and containers
The mold determines the shape of the finished piece and affects how the resin cures inside it. For flower preservation work, choose molds that match the formula you are using.
Silicone molds work best for most flower preservation projects. They are flexible, allow easy demolding, and do not react with the resin. For bouquet blocks, large silicone block molds or custom wooden forms work well. For jewelry, silicone pendant and ring molds are the standard choice.
For Deep Pour work in wooden forms, all inside seams must be sealed with sheathing tape and silicone to prevent leaks. Deep Pour at 600 CPS is thin and will find any gap.
Equipment and materials
A complete flower preservation setup needs: graduated mixing cups, mixing sticks, nitrile gloves, safety goggles, an apron, a heat torch or heat gun, a spirit level, a dust cover for the curing piece, isopropyl alcohol for surface cleaning, and a stable workspace at 21 to 25°C.
For sealing botanical material before pouring: a foam brush for applying the seal coat.
Optional but useful: tweezers for placing small flowers precisely inside the mold, a toothpick for adjusting placement once resin is poured, and silicone dye or mica powders if you want to add colour to any layer.

Step-by-Step: How to Preserve Flowers in Resin
-
Prepare and dry the flowers
Dry the flowers fully using your preferred method. Check for complete dryness before proceeding. Any softness, moisture, or green color in stems indicates the flowers need more drying time. For silica gel drying, brush off all crystal residue with a soft brush before placing flowers in the mold.
If the flowers have stems, decide whether to include them or trim them down. Full stems add volume and require a larger, deeper mold.
For a detailed guide on every drying method and how to choose the right one for your flowers, watch How to Dry Flowers: A Complete Guide from Craft Resin. And for everything you need to know specifically about preparing flowers for resin work, watch How to Prepare Flowers for Preservation In Resin. -
Prepare the mold and workspace
Place the mold on a completely level surface. Use a spirit level and adjust the surface until it is flat. Resin follows gravity and an uneven surface produces an uneven result.
For wooden dam molds, apply sheathing tape to all inside seams and press firmly to remove any air gaps. Run a thin bead of silicone along every seam and let it set completely. Test for leaks with isopropyl alcohol before pouring any resin.
Clean the inside of the mold with a dry cloth. Do not use silicone-based sprays inside the mold as these can cause fish eyes in the resin surface.
Set up PPE: gloves, goggles, apron. Ensure the room is at 21 to 25°C with no drafts and humidity below 65%. -
Pour the first seal layer (Arts and Crafts)
For deep bouquet preservation projects, start with a thin Arts and Crafts seal layer before adding flowers or Deep Pour. This step is optional for very shallow projects but important for anything involving thick pours around unsealed botanical material.
Mix Arts and Crafts resin at 1:1 by volume. Pour a thin layer, 2 to 3mm, into the base of the mold. Allow it to reach gel state before proceeding. This usually takes 12 to 18 hours. The surface should feel slightly tacky but leave no fingerprint.
This base layer creates a clean foundation and prevents air from escaping upward through the mold base during the Deep Pour stage. -
Arrange the flowers
Once the base layer is at gel state, arrange the flowers inside the mold. Work carefully and decisively. The tacky surface will help hold flowers in position.
Place the largest and most visually important elements first. Fill gaps with smaller blooms, leaves, and filler flowers. Use tweezers for precision on small or delicate pieces. Keep stems and foliage tight against the arrangement to avoid large air pockets between plant material.
For staged pours with multiple layers of flowers, plan the arrangement in advance. The flowers at the base of the mold will appear closest to the viewer in the finished piece. -
Pour the first Deep Pour layer
Mix Craft Resin Deep Pour at 2:1 by volume: two parts resin to one part hardener. Mix slowly for 3 to 5 minutes, scraping sides and bottom throughout. Transfer to a second clean cup and mix again briefly.
Check the temperature of both bottles before mixing. If they feel cool, warm them in a warm water bath for 10 minutes before measuring. Warmer resin flows better around botanical material and releases bubbles more easily.
Pour from one corner of the mold, slowly and close to the surface. Let the resin rise naturally around the flowers. Do not pour directly onto delicate petals from height. Stay within the 6 cm layer limit for large open molds. For narrow molds, reduce depth to 4 to 5 cm per layer to manage heat buildup.
Watch our full tutorial on How to Preserve a Dried Flower with Craft Resin Deep Pour to see this step in action.
After pouring, let the resin rest for 5 minutes. Surface bubbles will begin to rise on their own. Do not torch Deep Pour. Instead, use a toothpick to pop surface bubbles or blow through a straw gently over the surface. Cover loosely and allow to cure for 18 to 24 hours until the tacky window is reached. -
Add subsequent Deep Pour layers if needed
For large bouquet blocks, multiple Deep Pour layers are needed to reach the full height of the arrangement. Pour each layer during the tacky window of the previous one: 18 to 24 hours after the last pour, when the surface feels sticky like the back of a sticker but leaves no fingerprint.
If you miss the tacky window and the previous layer is fully hard, lightly sand the surface with 220-grit paper, wipe away dust with a dry cloth, and pour the next layer directly on top.
For each new layer, repeat the same slow pour technique. Add any remaining flowers into the appropriate layer as you build up the depth. -
Pour the final top layer and demold
Once all flower layers are in place and the resin has reached just above the top of the arrangement, pour the final Deep Pour layer to seal everything in. Allow this layer to reach full hard cure before demolding, which takes approximately 48 hours.
Do not rush the demolding. Deep Pour reaches full mechanical strength after 21 days. The piece will hold its shape at 48 hours but it is at its most vulnerable to surface marks and pressure during the first week.
For silicone molds, flex the mold gently and peel it away from the sides. For wooden forms, remove the walls carefully one at a time. -
Apply the Table Top finish (for flat surface projects)
For tray surfaces, panels, or any flat floral piece that needs a final protective coat, apply Craft Resin Table Top once the base resin has fully cured.
Clean the surface with isopropyl alcohol and allow it to dry completely. Mix Table Top at 1:1 by volume, mix slowly for 3 minutes, and pour in the centre of the surface. Spread with a foam brush once and allow it to self-level. Pass a torch at 15 to 20 cm in quick, moving passes to remove any surface bubbles.
Table Top adds scratch resistance, stronger UV protection, and a mirror-hard glass-like finish that elevates the appearance of the embedded flowers dramatically. -
Sand and polish if needed
Once fully cured, the resin block or surface can be sanded and polished to remove any surface imperfections, mold lines, or dull areas from demolding.
Start with 220-grit wet sandpaper and work through progressively finer grits: 400, 800, 1500, 2000. Finish with a resin polish or car finishing compound applied with a soft cloth. This brings the surface to full optical clarity and a mirror finish.
Pro Tips for Flower Preservation in Resin
Seal botanical material before the main pour. Dried flowers still hold microscopic air pockets in their petals and stems. When warm resin contacts them, that air expands and creates bubbles that appear to come from nowhere. Brushing a thin coat of mixed Arts and Crafts resin directly onto the flowers before the main pour seals those pockets. Let the seal coat reach a tacky stage before proceeding.
Work in stages for larger arrangements. Do not try to pour the entire volume at once. Staged pours with a 18 to 24 hour wait between layers give you control over flower placement, reduce heat buildup, and produce a much cleaner result with fewer trapped bubbles.
Use silica-dried flowers for the best colour retention. Air-dried flowers tend to fade and lose saturation. Silica gel drying preserves the original colour much more effectively. For wedding bouquet work where colour accuracy matters, silica drying is worth the extra time.
Check for leaks before mixing any resin. Pour isopropyl alcohol into the mold and let it sit for 5 minutes before mixing any resin. If the alcohol seeps through a seam, fix the seal now. Cleaning up a Deep Pour leak after mixing is far more difficult and wastes expensive material.
Allow full cure before sanding or polishing. Deep Pour reaches full mechanical strength after 21 days. Sanding before this point can cause surface marks that are difficult to remove. If you need to speed up the timeline, keep the piece in a consistently warm room of 24 to 28°C throughout the cure.

Common Mistakes in Flower Preservation with Resin
Using flowers that are not fully dry. Any moisture in the botanical material causes cloudiness, bubbling, or colour bleed into the resin. Dry completely before any resin contact. When in doubt, give the flowers another week.
Using Arts and Crafts or Table Top resin for deep pours. Neither Arts and Crafts nor Table Top is designed for pours deeper than 6mm and 3mm respectively. In a deep pour these formulas generate too much heat during curing, which causes yellowing, cracking, and in some cases dangerous temperature buildup. Use Deep Pour for any casting that exceeds 6mm.
Pouring Deep Pour too thick in narrow molds. Even Deep Pour has heat limits in confined spaces. In a narrow mold, reduce the layer depth to 3 to 4 cm per pour. The wider and more open the mold, the less heat builds up.
Torching Deep Pour resin. Deep Pour should never be torched. The formula generates heat during cure and adding external heat increases the risk of yellowing and cracking. Pop surface bubbles with a toothpick or straw instead.
Skipping the seal coat on botanical material. Flowers placed directly into Deep Pour without a seal coat often produce a ring of bubbles around the petals and stems as air escapes during curing. The thin Arts and Crafts seal coat step closes this problem before it starts.
Demolding too early. A piece that feels solid at 48 hours is not fully cured. Surface marks, dents, and warping can still happen in the first week. Give the piece the full 21 days before heavy handling or polishing.
Quick Recap
Before every flower preservation project, keep these points in mind:
- Flowers must be completely dry before any resin contact
- Deep Pour is for castings deeper than 6mm including most bouquet blocks
- Arts and Crafts is for thin layers, shallow molds, jewelry, and the first seal coat over flowers
- Table Top is for the final protective gloss finish on flat surfaces only
- Seal botanical material with a thin Arts and Crafts layer before the main Deep Pour
- Never torch Deep Pour resin
- Stage pours in the tacky window for the strongest bond between layers
- Allow 21 days for full mechanical strength before sanding or polishing
FAQ: Flower Preservation in Resin
What is the best resin for preserving flowers?
The best resin depends on the depth of the project. For thick casting blocks and bouquet preservation, Craft Resin Deep Pour is the correct formula. For shallow projects, coasters, and jewelry, Craft Resin Arts and Crafts works well. For a protective gloss finish over a cured floral surface, use Craft Resin Table Top.
Do flowers need to be dried before putting them in resin?
Yes. Flowers must be completely dry before contact with resin. Any remaining moisture can cause cloudiness, bubbles, colour bleed, or curing problems. Fresh flowers should not be placed directly into resin.
Why are there bubbles around my flowers in the resin?
Bubbles around botanical material usually come from air trapped in the petals and stems. As the resin warms during curing, that air expands and creates bubbles. Seal the flowers with a thin coat of Arts and Crafts resin before the main pour, let it reach a gel state, then pour the main casting layer on top.
Can I use fresh flowers in resin?
No. Fresh flowers contain moisture, which can cause the resin to discolour, produce bubbles, or prevent full curing. Always dry flowers completely before encapsulating them in resin.
How long does flower preservation resin take to cure?
Craft Resin Deep Pour reaches hard cure in 48 hours and full mechanical strength after 21 days. Arts and Crafts reaches hard cure in 24 hours and full strength in 72 hours. Table Top finishes reach hard cure in 36 hours and full strength after 21 days. All timings assume a stable room temperature of 21 to 25°C.
Can you preserve a wedding bouquet in resin?
Yes. A wedding bouquet can be preserved in resin if the flowers are fully dried and the pour is planned in layers. For thick bouquet blocks, use Craft Resin Deep Pour. It is designed for deeper casting and helps manage heat better than standard coating resin. Photograph the bouquet before drying so you can recreate the arrangement inside the mold.
Why did my flower preservation resin turn yellow?
Yellowing is usually caused by using the wrong formula for the pour depth, overheating during cure, or torch use on Deep Pour resin. Use Craft Resin Deep Pour for thick castings, stay within the recommended pour depth, and pour in thinner stages if needed.
What is the difference between pressed flower resin and encapsulated flower resin?
Pressed flower resin uses flat, dried flowers embedded in a thin layer of resin, typically for jewelry, coasters, trays, or surface coating. Encapsulated flower resin preserves three-dimensional botanical material inside a thicker clear block using Deep Pour resin.
How do I get a clear, glass-like finish on my flower preservation piece?
For a glass-like finish, sand the cured piece through progressively finer grits, then polish with a resin polishing compound. For flat surfaces, applying a final coat of Craft Resin Table Top over the cured base resin creates a hard, mirror-like finish without sanding.
Can you put roses in resin?
Yes, but roses must be completely dry before casting. Fresh roses contain moisture, which can cause bubbles, cloudiness, colour bleed, or curing problems. Pressed rose petals work well for flat projects like coasters, trays, and jewelry. For three-dimensional roses, use fully dried flowers and a deep-pour resin if the mold is thicker than a shallow pour.
How do you keep flowers from floating in resin?
Work in layers instead of filling the mold all at once. Pour a thin base layer first and let it reach a tacky gel state, then place the flowers on top. For deeper projects, continue with staged pours to hold the flowers in position and stop them rising to the surface.
How do you stop flowers turning brown in resin?
Flowers usually turn brown because they were not fully dry, were exposed to too much heat, or contained moisture inside the petals or stems. Use fully dried or pressed flowers, avoid overheating, and choose the correct resin for the pour depth. Keep finished pieces away from prolonged direct sunlight to help preserve the colour.
Do you need to seal dried flowers before resin?
Yes, sealing is recommended. Dried petals, stems, and leaves can still hold tiny air pockets, which may create bubbles once resin surrounds them. Apply a thin seal coat first, let it reach a tacky gel state, then continue with the main pour. For Craft Resin projects, Arts and Crafts resin works well as a thin sealing layer.
Can you use silica gel dried flowers in resin?
Yes, as long as the flowers are completely dry and any residue is gently removed before casting. The drying method matters less than the moisture level. Flowers should feel dry, not soft or damp, before they go into resin.
Ready to Start Your First Flower Preservation Project?
Flower preservation in resin gives natural materials a permanent home inside a crystal-clear, lasting piece. The process is straightforward when the right formula is matched to the right stage of the project. Deep Pour for the casting, Arts and Crafts for thin layers and sealing, Table Top for the final protective finish.
Shop Craft Resin Deep Pour for bouquet blocks and thick floral castings.
Shop Craft Resin Arts and Crafts for coasters, jewelry, and thin floral layers.
Shop Craft Resin Table Top for a hard, glass-like protective finish on flat floral surfaces.